
| " " |
|
| Facilities Research Publications Patents Astronomy Software SSC Observatories Contact Us | ||||||||||||||||||||||||||||||||||||||||||||
Filters for CCD Color Imaging
San Clemente, CA (c)1998 Software Systems Consulting All rights reserved. Recently, some club members and a number of attendees at RTMC asked for suggestions on filters for CCD color imaging. There is no topic I can think of that will get a more lively discussion going among professionals and amateurs alike. Nonetheless, I have decided to distill about 10 years experience in CCD color imaging for you here. CCD ResponseFirstly, CCD chips do not have the same range of response to light as the human eye. CCD's have weak response to blue light and excellent response to red and near infrared wavelengths.  Taking CCD performance into account, before choosing filters you must decide what you are about. Are you:
Picking a red pass band that includes the near infrared, will allow you to see through more interstellar dust than film photos. This can change the "classic" appearance of some objects, particularly emission nebula. If one wishes to obtain true color results, the most common approach is to block the IR response with an IR blocking filter. You either use an interference filter tuned to block the IR band, or you can use a clear piece of Schott glass. Schott glass is opaque to IR and passes all visible wavelengths. IR blocking filters are available from a variety of sources. IR blocking filters are not required if your colored filters are built on Schott glass blacks. Most filters are on Pyrex or standard plate glass blanks so and IR filter is required.  Where to put the filter in the optical path is the next choice. The Meade 416xt and 1616 CCD cameras have a 1.25" thread on the front of the camera to install the filter as the last element of the filter set. This is a very convenient place to put the filter, since it allows you to use a wide variety of different optical setups including barlows, telecompressors and camera lenses on your camera without having to fiddle with remounting the IR blocking filters. If your camera is not equipped with this feature, you can disassemble a standard 1.25" filter ring and mill of the back, leaving the front female treaded portion. Super glue this to the front of your camera and you get the same benefit. If you are thinking of trying this on your camera, cover the CCD windows with tape. The adhesives in super glue out gases and leave terrible residues. The will permanently fog the front of your camera if you don't cover them. If you are using a telecompressor (strongly recommended), you may need to put the filter further forward in the optical path to get the telecompressor close enough to the camera. In this case, you will end up spending more for the IR blocking filter since you will probably need to 2"/48mm filters. Don't cheap out on the IR filter. A poor one will doom your results. Get one with a high transmission ratio and a sharp cutoff.  The other reason to get an IR blocking filter it to block spurious responses from you color filters. Most color filters response curves have unwanted peaks in the infrared. The figure above shows the response of some typical interference filters.  Notice the nasty peaks in both the blue and green filters have around 750 nm. Your images can never look right if you don't block these responses. Above is he response of the same filter sets when combined with an IR blocking filter. Lowered SensitivityNow for the bad news, look what has happened to the awesome speed and sensitivity of your vaulted CCD camera. A full half the response of your CCD camera (as seen in the first figure) is due to near-IR/red response. That is gone. Even if you select filters that pass 100% of the desired colors (there are no such filters), you would still be getting only 1/6th the response from your CCD. Since the best interference filters seldom have better than 80% transmission in the center of their pass bands, you will practically obtain, about 1/10th the sensitivity you had unfiltered. In practice this means that those great 1 minute CCD images you were taking before will have to be at least 10 minutes guided in each color to get the same image quality. It is even worse than that in the green and blue, where exposures times can be even longer to compensate for the fall off of CCD response to blue and green. Wratten Filter SelectionIf you are just experimenting to see if color imaging is for you, I suggest that you use standard Wratten color filters. These are the same one sold by OPT and many of the mail order places for enhanced lunar and planetary viewing. These filters are basically colored glass. The exact color is well controlled and the colors are made to photographic standards. A 1.25" set of these filters will cost under $50.00 and can be used to other good advantages. Filters commonly used include the following values:
Of these filters let me discuss different sets.
The first set are the filters used to define the standard for color photography sixty-five years ago. Because the old silver emulsion films were very sensitive to blue light, a really heavy violet filter was used. These filters are note well suited to CCD images for two primary reasons. First, their transmission rates are so low that your exposure times would be 50 times longer than a monochrome CCD exposure to achieve the same image signal to noise ratios. Secondly, there is a hole between the #58 and #47 filter that contains the Hydrogen Beta emission line and the OIII emission line. The second set of filters, True color CCD, provides a good balance of color response, but suffers from the defect that their transmission ratios are very low in the blue and green. This can lead to very long exposure times. The combination I call "Fun CCD" is my recommended starter pack. The choice of the #80A as the blue filter, compensates for the diminished blue response of most CCD's. Similarly the lighter green tries to hold down the green exposure times within limits. Finally, wratten filters are usually available in matched thickness. This will keep you from having to refocus every time you change filters. Interference FiltersThese filters are expensive and fragile. They are constructed by carefully depositing alternate reflective and transmissive layers of materials where the thickness determines what wavelength will be passed. A set of these filters will run you $150 and up. Their primary advantage is that they offer transmission rates of 80% and will cut your exposure times in half. Calibrating Your FiltersBefore you can star taking good tri-color CCD images you are going to need to calibrate your filters. What you need is a uniformly illuminated white or gray target. Two easy choices are a reasonably bright G2 star or the moon. The idea is simple. If you are using a star, defocus the star so that it's disk covers at least 10x10 pixels. Take equal length exposures with your red, green and blue filters. Do this close together in time, so that you do not have to worry about atmospheric extinction effects. Process each image by subtracting a dark frame. Now measure the mean brightness of a 5x5 square in the center of the star. Now derive the red, green and blue response by the red response to get the relative color responses of your system.  For example with a sample star you might measure the following flux:
Now take the multiplicative inverse of the transmission factor to get the exposure time. Calibrating off the moon is a similar idea. Take images with R,G, & B filters of the moon. Find a nice smooth mare and average the flux over a 5x5 square and use the same method as above. Exposing Images The final key to getting good color CCD images is to use the longer exposures for weaker transmissions. If you take the same exposure with all three filters, you will find that all your faint objects look red. This is caused by the fact your system is going deeper in magnitude in the red. Fainter objects do not have enough time to register in the other colors, so all fainter objects are red shifted. It is also better to take one long exposure than several short exposures and co-adding them. Again, faint features will be lost in the noise and will never be picked up in the shorter exposures where they will record in a single longer exposure to the point where they rise above the noise. 
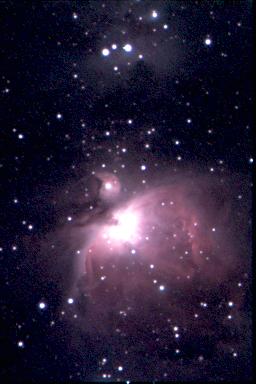
CCD color imaging is substantially more difficult that monochrome imaging. You will take 3 times the exposures and be back to guiding relatively long exposures. You will find the taking a great color CCD image will take an hour. This is as long as a good shot on film. The differences are that you can take color CCD images in suburban locations and once the images are captured, the scope and control of processing that CCD's provide allow you to bring out detail from the images that most film systems cannot rival.
 |
|
|
|
||
|
|
|